Best Tips for Teaching Online with Zoom
Amid this COVID 19 crisis, many apps have helped multiple businesses like coaching institutes to resume and function securely and easily. Zoom is currently the #1 most downloaded Business app in the Play store and the second most downloaded app overall. This feature-rich app enables teachers to teach their students from home. Despite there being a plethora of other options like Webex, Google Meet, GoToMeeting app, etc. being available Zoom takes over the competition and its competitors.
In this article, we list the features that set Zoom apart from its competitors.
To go through these settings, follow the given instructions or watch the detailed video below
Steps to follow:
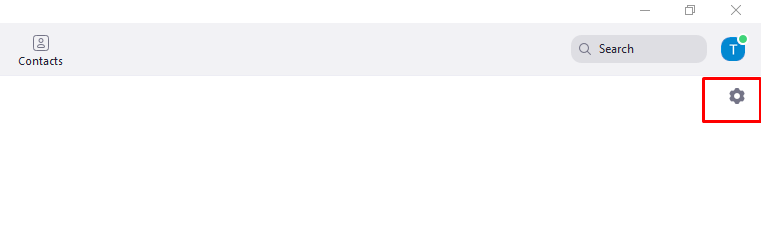
- Open Zoom on the desktop
- Go to Settings by clicking the gear-like button on the top right of the screen.
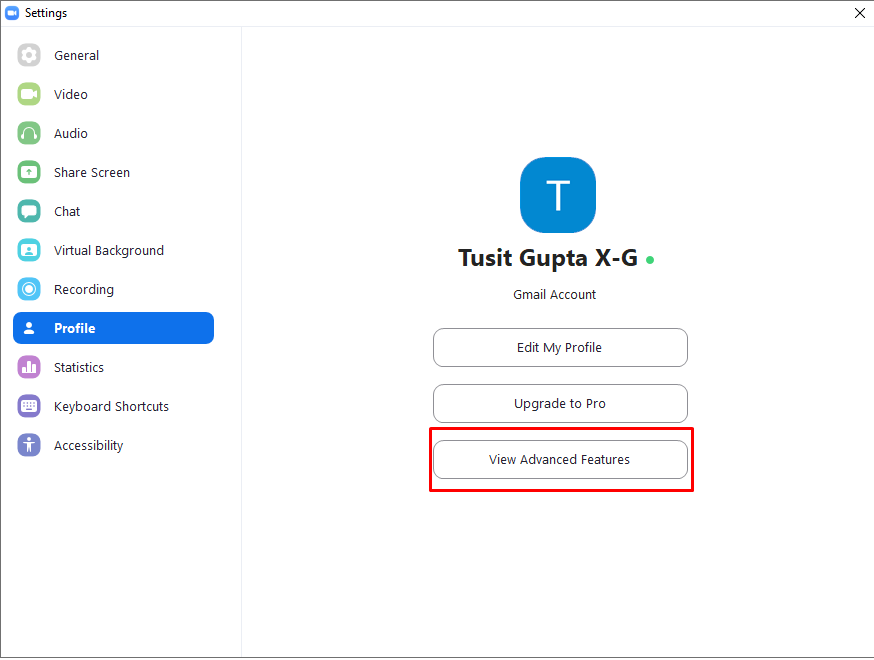
- Click Profile from the left of the screen and select view Advanced features.
Here is how to access the screen:
Sign in the browser on the Zoom website and complete the steps as notified. On the left side of the screen under Personal, click on Settings, and note that the required screen may open by default.
In this Settings menu, you can toggle the features as per your requirements. We will only be going through the unknown settings in this article.
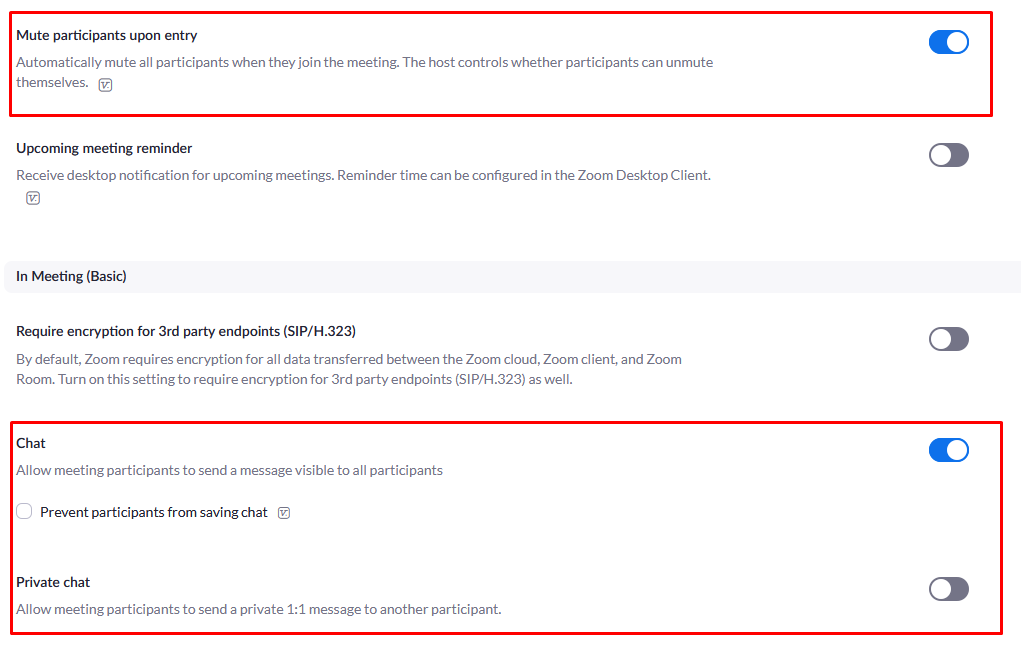
1- Muting participants upon entry
To prevent background noise in an ongoing session and to prevent the entering participants from causing chaos by ear raping, this feature has been added in Zoom.
2- Chat and Private chat
You can also prevent participants from sending chats to everyone, which is useful while you are teaching. Disabling private chats makes sure they cannot send private messages to each other while will make sure that the two people don’t ‘talk’ in class.
3- File Transfer
In case you prepared online notes for the class and want to share them, you should turn on this feature. This feature allows everyone to share files through Zoom, while in the meeting. You can also collect homework through this feature.
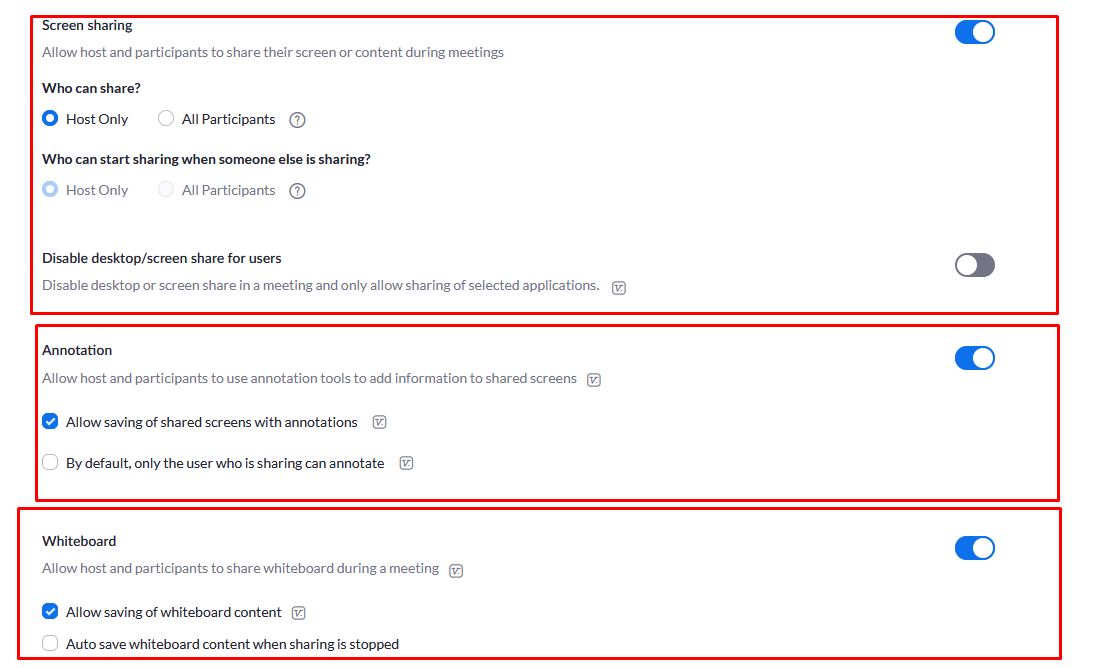
4- Screen sharing
You can turn on this feature to share what you see on the screen with others. You can control who can share screens, only the host or everyone.
5- Annotation
Annotation is the feature that allows you to write on the screen when you are sharing it. It is useful while sharing the screen. Again, you can control who can write, only you, the host, or both you and the participants. If any participant messes with the screen, you can see who did it by hovering the pointer over the scribble.
6- Whiteboard
Whiteboard produces a white screen for you to write concepts on and explain to them it is a blessing for Mathematics teachers. You can turn it on to get the option of sharing a whiteboard in a meeting.
7- Rename
You can disallow participants from renaming themselves during a meeting using this feature. This helps in avoiding the disruption of a class.
8- Break out room
Break-out room is a feature used for group discussions and teaching individually. You can use break out rooms by enabling this feature. It divides the participants in up to 50 different rooms, and you can switch between them. Read more about it here.
We hope you can now teach your students more easily and effectively using Zoom. All the features of Zoom should be used as needed to provide an optimum learning environment. Here is a table of settings you can turn on from the Zoom app itself if you have enabled it in the advanced menu.
| Muting partici- pants | Participants-> Mute All |
| Screen sharing | Share Screen |
| Annotation | Share Screen-> More-> Disable Participants Annotation |
| Chatting | Chat-> Three dots at bottom right-> Everyone publicly |
| Renaming | Security-> Rename themselves disallow |
| White board | Share Screen-> Whiteboard |
| Break out Rooms | Use Break out rooms |
| Share screen | Share Screen-> Advanced sharing options (look at the arrow top right of the button) |
Here are some screenshots of all features referred to in this article for reference:

We hope this article was helpful. In case of any questions, feel free to ask them in the comments section below.